How I found this Software
I had a crazy Idea that I wanted to do a 30 minute video with Legend of Zelda music featuring art by Ethereal Terrains, but I didn’t want just flat images in the video. Not that the art isn’t beautiful without motion, I just want to find a way to make it breathe a little more.
Knowing this, I remembered some of the new commercials I’d seen online for motion photo apps wherein the user selects an area that should move while keeping other areas stationary. Being on my laptop though, a mobile app (such as the ones I usually saw advertised) just wasn’t going to cut it. When I found PhotoMirage it seemed like a great option… except that it came at a cost: $69.99.
PhotoMirage does have a trial version you can use to test the tool if you’re not ready to spend the $$, but the exported file has a massive watermark logo in the bottom right corner. So, not at all ideal for sharing outwards or on social media,b but it is good for practice.
NOTE: I’m still uncertain whether I signed up for a subscription or not (receipt is unclear)… but I’ll be monitoring my statement to see how/if it charges over time.
What the Interface Looks Like
The user interface is extremely basic. You have a few buttons to toggle through, but the software itself is limited to creating only motion photos (hence why the price seems high).
The top navigation includes: (1) Animation, (2) Mask, (3) Select, (4) Freehand Select, (5) Smart Photo Fix, and (6) Crop.
I’ve found a few videos detailing what all of the options do, so I wont dive into them, but I will callout the main tool: Animation.
Animation (the large pink arrow icon in top left corner) has two key tools for the user: the Animator (arrow icon) and the Block (3 squares icon). Selecting the arrow icon allows the user to choose areas where they want the image to have motion (appears on image as a blue arrow). Selecting the block icon allows the user to choose areas where the want the image to remain stationary.
Animation (the large pink arrow icon in top left corner) has two key tools for the user: Animator (arrow icon above speed bar) and Block (squares icon above speed bar).
Selecting the Animator icon allows the user to choose areas where they want the image to have motion. Selecting the Block icon allows the user to choose areas where the want the image to remain stationary.

When you’ve selected one of the Animation tools, you can then click around on your image to create movement or stationary areas. Movement areas (created using the Animator) will appear on the image as a blue arrows with a circle start point and an arrow depicting direction of movement. Stationary areas (created using the Block) will appear as a red square dot.
See below for example:
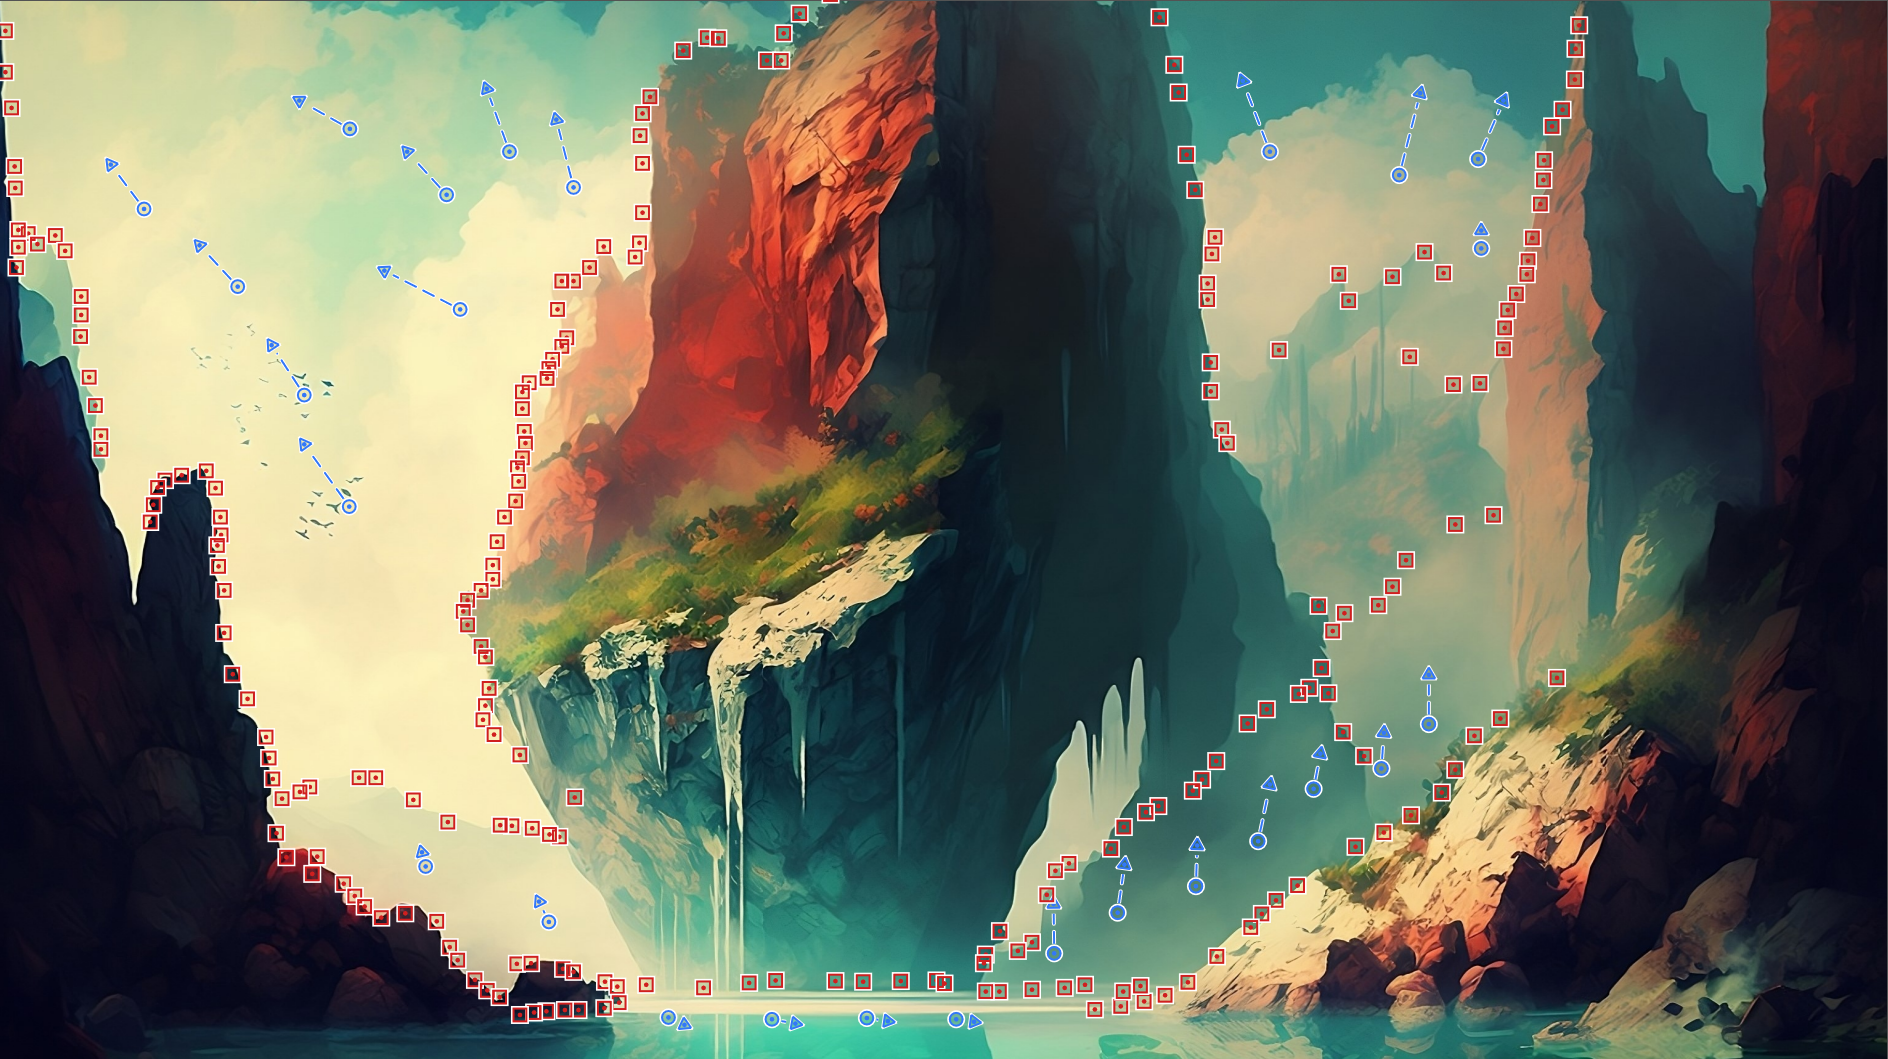
Notice that the blue arrows are used with clouds, fog, and water. This is because the motion works best and shows best when the edges of the art aren’t moving.
Once you’re ready to see the motion, click the Play icon in the bottom left corner of the user interface and you’ll see your handiwork.
Note: It’s ok if it doesn’t look right, you can go back and delete animators/blocks as needed.
Final Version
If you’d like more explanation on how this was done, let me know!
Thanks for reading!
